Arrr me mateys! Out there somewhere on the seas is a wonderful land full of treasures! But will you find it? In today’s tutorial, we’ll show you how to create this fun Pirate Map inspired business card. Show off your skills and get new clients excited to work with you because you’re their design treasure!
Software : Photoshop
Difficulty : Beginner
Completion Time: 3 hours
Images Used For This Tutorial:
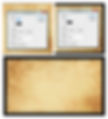
Old paper with grunge texture and stains. (paper, parchment background)
Example map and design elements to make your own fantasy or treasure maps. Includes mountains, buildings, trees, compass, etc:
Vintage nautical labels set (compass)
Step 1: Setup Your Files
If you’re using a third party website to print your business cards, just use one of their templates as an easy guide. The file will already be set up appropriately for professional printing. I’ll be using a ready-made one from Vistaprint.
Open your grunge paper reference in Photoshop. Image > Rotate Canvas > 90 Degrees CW then Copy and Paste it into the business card file. You can either create two separate files for the front/back side of the card, or you can just place them into separate groups. The latter may help keep the file organized in the future.
Lock this paper layer into place.
Files in their original vector formats are pieces you can easily drag into place (and better for overall print quality). But just in case you’re using the jpeg format, I’ll show you how to extract each detail you need.
Use the Lasso Tool (L) to select each component.
Copy and Paste each one we’re using onto a new layer in the business card file, setting the layer mode to Darken.
Step 2: Age The Pirate Paper
Now, to add a little wear and tear!
With the paper layer selected, use the Burn Tool (O) and burn the edges of the paper. Avoid the center as we’ll need it to be bright. This’ll help deepen the grunge effect.

On a new layer, use the Brush Tool (B) to paint brown squiggly details around the paper. Look for areas that stick out like places on a map and define them a bit more.
Set the layer mode to
Color Burnand continue to draw in some details wherever you see fit
Step 3: Business Card – Front
Position two new groups above the paper layers. One group is the front side of the card and the other is for the back.
Let’s work on the front side first. To create a border around the card, Ctrl + A to select the outside of it.
Right-click and add a stroke of 60px in black.
Deselect, and use the Marquee Tool (M) to create a smaller rectangle as a second border.
Right-click to add another black stroke of 3px.

Using the lasso technique we covered earlier, Copy and Paste the ship wheel onto the center of the card.
Ctrl + T to resize, trying not to stretch the image too much.
Set the layer mode to Multiply. If you’re using the original EPS file, edit the text on your own. If not, you can paint out the original text using the Brush Tool (B) and the Eyedropper Tool (E) to select the color.
Once you’ve erased the original text, add your own. In this case, I decided to add “Graphic Designer, EST Since 2014” as a general introduction using the Perpetua Tilting MT – Light font.

Add two compasses from the nautical labels set.
Place each one on either side of the ship wheel and bring down the opacity to 10%.
Set the layer to Darken and erase any overlapping bits if necessary.

Fill a new layer above the rest with the color Black.
Set the layer mode to Soft Light to deepen the colors of the card.
Adjust the Opacity to 50%.
Step 4: Business Card – Back
Now, let’s move onto the back! This part is super easy because we’re mostly repeating the same steps from earlier.

Duplicate the border layer from the front side of the card and drag the copy into the second group for the back of the card.

Next, add your business information. I’ve kept things pretty simple by only including the full name, career title, twitter, phone number, and email address. But feel free to add any other information!

Using the methods from earlier, add the ship, mountains, “x marks the spot”, and skull all on separate layers.
To tell the story of a pirate map, try to position some elements further away from each other so that you can connect them with a trail later. If you don’t have a letter “O” in your name, place the skull somewhere else on the map where you can mark as “dangerous territory.”

Add a compass behind the ship.
Ctrl+ T to resize it, then set the layer mode to Darken and the Opacity to 10%.
Step 5: Create A Trail
The last step for this tutorial is creating a path for the ship to travel on the map.
Using the Pen Tool (P), create a loose trail around the card that even travels off the edges. You can make the path travel wherever you’d like on the card, just make sure it doesn’t overpower the overall design.
Right-click to stroke the path using a solid round brush set to 7px.
Finish off by using the Erase Tool (E) to create a dashed line effect.
And that completes this tutorial! We hope you’ve had a lot of fun guiding your clients to the right design direction with this pirate-themed card!
