Create A Fast Food Chalkboard Illustration
- Feb 28, 2015
- 3 min read
Chalkboard signs are a creative way that businesses market to their customers. In today’s tutorial, we’re going to show you how to make a really simple chalkboard illustration effect in Adobe Illustrator, but first we’ll set everything up in Photoshop. So let’s get started!
Software: Adobe Photoshop and Illustrator CS6
Difficulty: Beginner
Completion Time: 2 hours
Images Used For This Tutorial
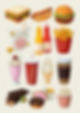
Preparing the Reference Image
Step 1
Create a new 600×800 document in Photoshop. Drag your reference of fast food icons onto the canvas.
Step 2
Use the Pen Tool (P) and trace around the icons you want to use. In this case we’ll be using the burger, fries, and soda. Right-click to Make Selection then Cut (Control + X) and Paste (Control +P) the burger onto a new layer.
Step 3
Repeat these steps with the fries and soda, until you have 3 separate cut and pasted layers of the icons. Delete the original icon layer when you’re done.
Step 4
Now that you have all 3 icons separated, arrange them how you’d like them to look. Usually the burger is the star of the meal so we’ll place it in front with the other icons behind. Make the burger larger by hitting Control + T to Free Transform and resize. Free Transform the other icons and rotate them into place also by hitting Control + T.
Step 5
Merge all the icons together onto one layer. Resize the icons so that they’re large enough to trace by hitting Control + T to Free Transform. Hold the Shift Key while resizing to make sure the icons keep their original shape. Save for web as a high resolution jpeg and get ready to trace!
Step 6
Create a New Document in Adobe Illustrator and place the reference image you created onto the document. Hide the visibility of this layer for now.
Step 7
Use the Rectangle Tool (M) to create a large dark gray rectangle on a new layer. Lock this layer to keep it in place.
Tracing the Food
Step 8
Drag your reference image so that it’s on top of the rectangle layer in the Layers Panel. Unhide the image and select the Pen Tool (P) to begin tracing the food icons.
Step 9
You can add as many of the details you see as you’d like, but for this particular example we’ll keep things pretty simple. Begin tracing the bun of the burger. Select the Selection Tool (V) and set the Stroke to White, and the Brush Definition to Charcoal. This will give the chalk line effect we’re looking for. For more versatility with the look of the brush, you can also play with the Variable Width Profile in CS6.
Step 10
Continue tracing the details of the burger using the exact same settings as before for the pen tool. When you’re done with the burger, select all the layers and Control + G to group them together.
Step 11
Now move onto the fries and soda. Follow the same steps as before, tracing the details first then applying the charcoal effect.
Step 12
Once you’re done with the fries and soda, your completed chalkboard drawing should look like this. To keep things neat, remember to group your layers together as we did before, using the Selection Tool (V) to select them then group the layers together (Control + G). Use the Selection Tool (V) to select all the layers—the burger, fries, and soda and resize them to make them larger while holding the Shift key. Position them onto the middle of the board.
Step 13
For the last step, use the Rectangle Tool (M) to create a simple rectangle for your title Text. Then add the title and subtitle you’d like best. Here we used the font Myriad Hebrew set to Bold Italic.
Conclusion
And that’s it! Here is your completed chalkboard drawing! Have fun making recipe lists, menus, and more with this quick illustration. Enjoy!