Did you know that it’s possible to create vector illustrations in Pixlr Pro? In this tutorial, I’ll show you how to create such an illustration just in time for Valentine’s Day!
We’ll need some assets first:
Open the photo of a kissing couple in Pixlr Pro.

Grab the Pen Tool (P) and make sure it’s in Shape mode, with some Fill and no Stroke.

Let’s outline the hair first. You don’t have to create a new layer, because shapes add one automatically. Click at one point of your imagined outline.

Click at another place and drag at the same time. This will let you create a curve. That curve is defined by the position of the handles that appeared around your point. Do you see how the handle on the left draws the line towards itself, making a curve? The handle on the right will do the same with another line you draw.

Add another point of the outline to see it in practice. You can still click and drag to create a curve, but the handle of the last point will limit you. So if you want to be precise, keep the handles short and close to the imagined outline.

Outline the whole hair this way. To finish, just click the first point again.

The best thing about shapes is that they can be modified after they’re drawn. To change the color of the hair, go to the Properties tab and click the Solid Color Fill.

Let’s outline the face now. Here you should be more precise than in drawing hair, so don’t make the handles too long.


Also, at some points you don’t need any curves, just a sharp turn. To do this, just click without dragging.

Here’s the whole face, outlined and colored. If you move its layer under the hair you won’t have to care about the left side.

To draw the elements of the face, lower the Opacity to see the photo.

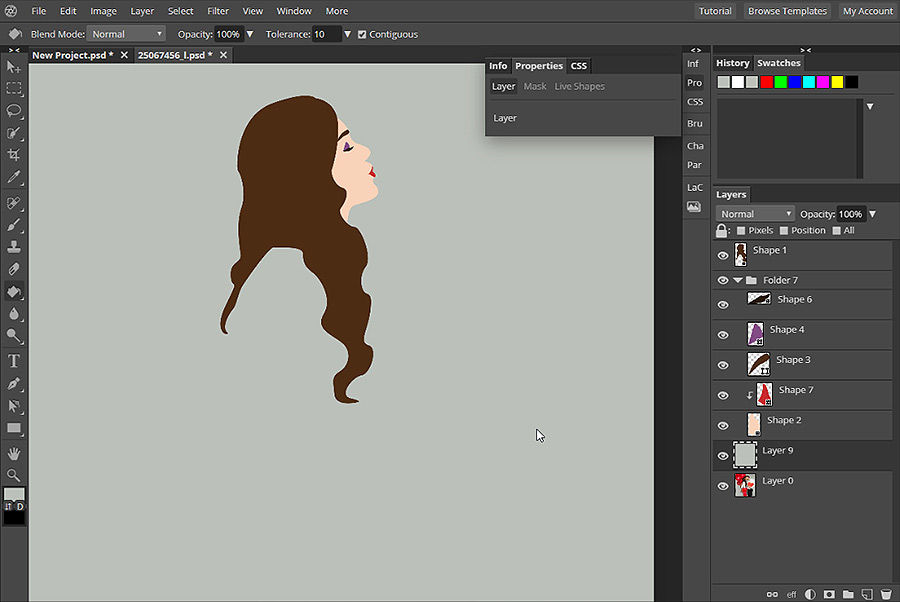
Draw the eyebrows, the eyelid, the eyelashes, and the lips. You can draw just the left side of the lips and Alt-click the line between their shape and the face to create a Clipping Mask.

Add a neutral background behind the shapes to see them better. Hide/show the layer during the process to see how you’re doing.

Add the other elements: the shirt…

… the skirt…

… and the body. To keep some order in the layers, keep them in groups (Control-G).

Draw the man the same way.

Use the Crop Tool (C to make the canvas a little bigger.

Draw one of the balloons.

Duplicate the balloon (Control-J) and use the Free Transform Tool (Control-Alt-T) to create a variety of size and position. Give the balloons different shades of red as well.

Let’s add the ribbons now. We can use the Pen Tool again for this, just with different settings. This time use Stroke instead of Fill, and change the Size of the stroke to something as thick as the ribbons should be.

Draw a ribbon as you would any other path.

Draw all the ribbons this way, changing the thickness of the stroke from time to time.

The illustration is technically done, but we can make it a little more appealing yet. Double click one of the shapes to open the Layer Style panel. Check Drop Shadow and adjust its settings to create a soft shadow under the shape. Press OK when you’re done.

To add the same style to other elements, right click the layer and select Layer Style > Copy, then Layer Style > Paste. If you add the style to a whole group, the layers inside will be treated as a single shape. If you want to add shadow to each of them, you’ll have to paste the style to the layers, not the group.

Finally, let’s add some background. Drag it into the file and resize it with Control-Alt-T.

Add a Layer Mask (1), click the mask (2) and draw a gradient on it (3). On the mask black means transparent, and white—opaque. So adding a black/white gradient allows you to create a gradient of transparency.


You can also change the color of the background layer to create a nicer effect.

That’s all! Remember that in a vector artwork you can always change the colors and shapes until you’re completely happy with the effect.