Gather around, Potterheads. Magic is real. Have you always dreamt about getting that Hogwarts acceptance letter and getting a turn with the sorting hat? Live out your fantasy; turn your backyard into a scene at Hogwarts. It’s almost as if you got on the next Hogwarts Express train.

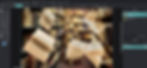
We’ve come up with a few ways to create a Harry Potter-themed photo to spark the magic. To illustrate, we’re going to turn this

into this – don’t worry, we’ll guide you through the process!

Harry Potter inspired photo with flying books and magic sparks, edited on Pixlr using images by maximilian100 (Background image), pictureguy66 (Owl), andreykuzmin (Envelope), and belchonock (Books) from 123RF.
Put on a Wizarding World-worthy outfit
This is the best time to put on the iconic and glorious cloaks and robes representing your house – Gryffindor, Slytherin, Hufflepuff, or Ravenclaw. If you don’t have Harry Potter costumes such as the Hogwarts school uniforms or Quidditch robes on hand, use any article of clothing that can pass off as a long, dark robe or a gray V-neck sweater and a pointed hat for an added wizardry effect. You can even attempt a ‘wizard off-duty’ look, wearing unusual styling of muggle clothing. And don’t forget the wand!
Now, have a photoshoot with your outfit of the day! You’ll need these photos for the next step – the levitation charm.
Wingardium Leviosa aka The Levitation Charm
“Can you say Wingardium Leviosa?” The levitation charm is one of the famous spells from the Harry Potter series popularized by Emma Watson’s character, Hermoine Granger. With the flick of a wand, a witch or wizard can make anything or anyone fly.
It’s the perfect way to add magic and wizardry to your outfit. With just a little editing work, you can be the master of the levitation spell. For this example, we’ll add levitating books.
Open your main image in a photo editing software like Pixlr E. Then, click Add a Layer and insert an image of the object you want to levitate.

Add layer and insert an Image on Pixlr
To isolate the books from the background, you can use Pixlr’s free background remover. Or, you can upload the image of the objects and click on Layer and AI Auto Mask.
Process of removing the background of image on Pixlr

Select AI Auto Mask to remove the background on Pixlr
Then, use the Lasso tool to clean up the edges to make them more crisp and natural.

Select the Lasso tool to clean up the edges on Pixlr
Hogwarts acceptance letter
Many kids dreamt of being greeted with an owl on the window sill, carrying a letter. To live out the fantasy that a Hogwarts acceptance letter has found you, you need an image of an envelope with a red wax seal stamp and an image of an owl (which will be named Hedwig). Download them here and here.
After you’ve downloaded the images, click on Add a Layer. Then, open the images and remove the background just like the step before. We decided the placement of the owl and the letter to be further and smaller in size to create the illusion of the owl approaching from afar.

Reducing sizes: Image of the Hogwarts letter and Hedwig the owl to make it seem like they’re further on Pixlr
The wand chooses the wizard
There’s a grand revelation in the Harry Potter series that the wand chooses its owner and who is worthy of wielding its power. It goes like this: “Possessing the wand isn’t enough! Holding it, using it doesn’t really make it yours… The wand chooses the wizard.” It’s safe to assume that a wizard is only as worthy as their wand.
No wizard is complete without their wand, and we hope that your wizarding outfit has included a wand. Let’s make the wand come to life. We can make the wand look magical by adding a glow of light on the wand’s tip.
Click on Element, and place a glowing star on the wand tip. Next, adjust warmth and set the blend mode to Screen. Looks much magical, doesn’t it?

Select Add Element/Image on Pixlr

After adding the glow element to the wand on Pixlr

Setting the blend mode to Screen and adjusting the warmth of the Wand Glow on Pixlr
Add dashes of magic
But there’s still something lacking. To make it all come together, let’s add magical swirls.
Click on Element, and add magic swirls wherever appropriate. We’re adding the swirls to the books. Set blend mode to Screen.

Adding the Magic Swirl element on Pixlr
Color grading
The last and final step is, of course, color grading. Color grading can add dimensions to your photo, establishing an atmosphere and creating the mood, and setting the witchy scene.

Adjusting the colour grading scales on Pixlr
First, we tweaked the warmth, brightness, and vignette to create the desired effect. Next, click on each layer of images and adjust according to what you think looks realistic and blends in.
TIP: Adding a slight blur to elements in the background helps create a depth of field.
For reference, this is what we did for the background image:
Vibrance +11
Temperature +21
Black +26
Highlights +40
Shadow +8
Clarity +10
Vignette +44.
For Hedwig, the owl:
Blur +8
Temperature +70
Vibrance +30
For the envelope:
Exposure -28
Blur +8.
This is the final look:

Harry Potter inspired photo with flying books and magic sparks, edited on Pixlr using images by maximilian100 (Background image), pictureguy66 (Owl), andreykuzmin (Envelope), and belchonock (Books) from 123RF.
As always, feel free to play around with the editing styles and colors and add your twist to it! Hop on a broomstick, add a cauldron, get creative!
Hopping on the Hogwarts Express content train? Find the perfect stock photos for your content curation with our guide to 123RF’s advanced image search filters! If you’re a movie buff, you’ll definitely appreciate this blog on 10 places from movies that you can actually visit!