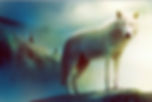
We will use two stock images for this photomanipulation. I will teach you how to cut out your animal stock and how to create atmosphere in your images by using light and color.
Software: Photoshop CS5
Can be used on a tablet
Difficulty: Intermediate
Time of Completion: 40 minutes


Click images to download the stock
Step 1:Cutting out the image
We will first select the animal that we want to cutout. Use the ‘Quick Selection Tool’ located on the left toolbar in photoshop.
I want to keep the rock and wolf and get rid of the rest of the background. When you click the tool a menu will appear at the top above your canvas. Once I have selected everything with the ‘Plus Quick Selection Tool’, as shown in the menu here, I click the refine edge button.

Your image should look something like this when selected.

Once you have clicked ‘Refine Edge…’ a menu will appear. I put contrast to 15 and shift edge to -7. Shitfting the edge to a negative will take away more from the image then selected. Last but not least I set the Output to: ‘New Layer with Layer Mask’. This will create a copy of the image with a mask to hide the unselected part. Click OK when done.

Your image should look like this now.

You can see in the layer menu (see image below) on the right side of your canvas that photoshop has created a layer masked linked to the photo. It’s the black and white layer that is selected in the image. You can use it to bring back parts of the wolf with the white brush and the black brush for getting rid of unwanted areas. It’s a non-destructive way to work on your stock photo. Be sure you have the mask layer selected when working on the wolf and not the actual stock photo. You know when it is selected when you see lines around it as in the image on the left.
Step 2:Refining the cut out of your image
We will add a background so we can further refine the cutout more easily. I added a winter view of the tree tops. When I want my focus to be on the animal I always slightly blur my background to create a fake depth of field. I do this by going to Filter > Blur > Lens Blur. You can see the difference below.
I also cut out more of the wolf his fur with the brush tool on the mask layer so the rough edges disappeared.

Once in the Lens Blur menu I set the radius to 10. The more blurry you want the background the higher you have to set your radius setting.

Your wolf will still look very cut out with straight lines and no fur showing. This is what I do the bring back the fur effect. Select the Dune Grass brush

Now set the brush setting as follows:

It’s very important that your ‘Angle Jitter Control’ is set to Direction. This way however you move your pen it will move in the same direction as your pen does.

I went along the edges of the wolf with the ‘Dune brush’ on the mask layer. Sometimes with white to erase parts and sometimes black to bring back part of the wolf. When done it should look like the images above.
The cut out of your wolf is done! Good going! Now onto the rest.
Step 3:Creating atmosphere with light and color

Beneath the layer menu you see a small toolbar. I use the ‘Adjustment tool’ often.

I will come back to that later. Keep it in mind for now. I start out by creating a layer above my wolf layer. I then right click on the layer. A menu will appear. Select ‘Create clipping mask’ to attach the layer to the layer underneath (in this case the wolf). This means that the layer will only affect the layer it is clipped to.
I fill that layer with 50% gray color. Go to your color picker drag it all the way to the left and set the B in the menu to 50. This will exactly set the gray color to 50%. Or put #808080. Set that layer to ‘overlay’ .
Use the Dodge and Burn tool on the50% gray layer to work in shadows and highlights on your wolf.


Always look where the light is and if the background and foreground match up.

I create another ‘Clipping mask’ above my wolf layer to create more shadow. I use a dark blue color selected from the background. I set my layer to 42% Opacity and to ‘Multiple’. I use pen pressure to vary between the amount of blue I put in each area. I use the Eraser tool to bring back light on the wolf. See the top of his back and legs, again with pen pressure.
I also create a blue shadow layer for my background with the same settings.

Onto my favorite part. I create three overlay layers and start lightly brushing in two kinds of blue on two of the layers and yellow on another to give color and set the mood of the piece. My yellow layer is set to Opacity 43% because I thought it was to intense otherwise. You can do it with any colors you like but I decided to take blue because it was already in the images and yellow because they are nice complementary colors. I then go to the ‘Adjustment tool’ to further intensify the colors. Once you clicked the tool select ‘Selective color’. I always play around with these settings to see what looks good.
I have used the following settings on this image (be sure they are above all your other layers). You can use one adjustment layer to set all the different colors. See the images below for the exact settings I used.


Step 4:Finishing touches
I always create a copy of the animal stock and put it above the original as a clipping mask. I then use the ‘Sharpen tool’ to add extra sharpness to the eyes and nose of the wolf. Be careful you don’t overdo it or else it will become very grainy and pixelated. I also highlighted the wolf’s eyes by making a new layer above the wolf stock and setting it to overlay at 86% opacity and coloring in the eyes with a soft brush using the same yellow as before.


The last two steps are creating a sharpened layer and a softer look for other parts of the image. Make a new layer with copy merged to get a complete copy of all the layers together. I do this by going to Filter > Other > High Pass . Make sure you don’t make the lines too sharp. I usually stay below 2.5. Put the layer to overlay. Mask out any parts that you don’t want sharpened. Copy merge the complete layers again and go to Filter > Blur > Gaussian blur. In the Gaussian blur menu set a slight blur. Set the layer opacity to 52% and Fill to 67%. Create a mask layer for any areas you want to keep sharp. Usually these are parts of the face and areas of fur.


The finished piece. This is how I do pretty much all of my animal stock.
Feel free to experiment and have fun!